How to Install Braided Wigs: A Complete Step-by-Step Guide
Installing braided wigs correctly is the key to achieving a natural, flawless, and long-lasting look. In this comprehensive guide by Braids Wig Queen, you’ll learn how to install braided wigs easily whether you’re a beginner or a seasoned wig lover.
This guide covers everything from hair preparation to styling tips, helping you get salon-quality results at home making you an expert on how to install braided wigs for yourself and others.
What You Need to Install a Braided Wig
- Wig cap
- Wide-tooth comb
- Bobby pins or hair clips
- Scissors
- Wig adhesive or gel (optional)
- Edge control or foundation for blending
Using quality tools makes a big difference. Explore our recommended accessories on Braids Wig Queen Accessories.
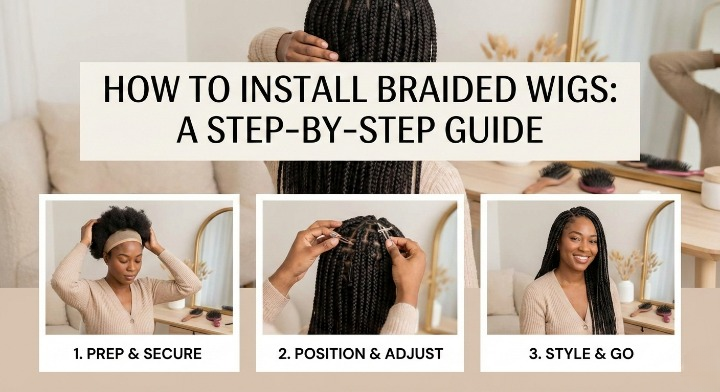
Step 1: Prepare Your Natural Hair
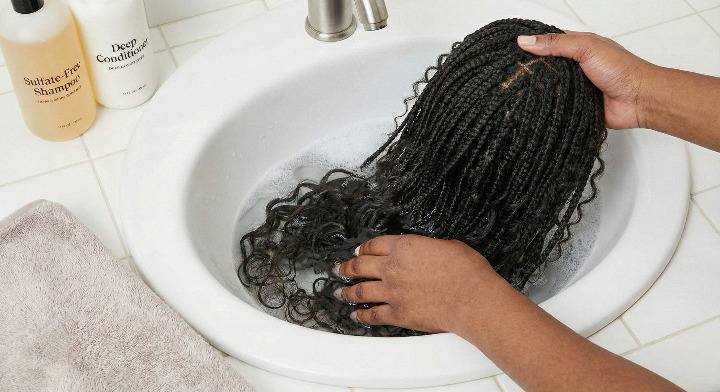
Clean and Dry Your Hair
Always start with clean, dry hair. Shampoo and condition your hair to remove oil and buildup. This allows your braided wig to sit flat and prevents slipping.
Braid or Flatten Your Hair
For the best braided wig installation, flatten your hair using cornrows, flat twists, or a sleek low bun. A smooth base ensures a natural appearance.
Wear a Wig Cap
Place a wig cap over your hair to secure it and protect your natural strands. Choose a cap close to your scalp tone for better blending.
Step 2: Prepare Your Braided Wig
Adjust the Wig Size
Before installation, adjust the elastic bands or straps inside the wig cap. A snug fit prevents movement and increases comfort throughout the day.
Inspect and Detangle
Gently separate the braids with your fingers to remove tangles and ensure the wig is ready to wear.
Step 3: Install the Braided Wig
Position the Wig Correctly
Align the braided wig with your natural hairline. Make sure it sits evenly from ear to ear before securing it.
Choose Your Installation Method
Glue or Adhesive Method
Clean your hairline with alcohol, apply a thin layer of wig adhesive, and gently press the lace down. Allow it to dry for a secure hold.
This method is commonly used for lace braided wigs and offers a very natural finish. Learn more from Jaliza’s braided wig guide.
Glueless Installation Method
Glueless braided wigs use adjustable straps and combs, making them ideal for beginners. This method protects your edges and allows easy removal.
Step 4: Secure and Blend the Wig
Trim Excess Lace
Carefully trim any excess lace around the hairline using small scissors. Avoid cutting too close to the braids.
Blend the Hairline
Apply foundation or concealer that matches your skin tone to the lace. This creates a realistic scalp appearance.
Step 5: Style Your Braided Wig
Lay Your Edges
Use edge control to style baby hairs for a polished and natural look.
Accessorize Your Braids
Add beads, cuffs, or wraps to personalize your braided wig style. Accessories elevate your look and make it unique.
Tips for Maintaining Your Braided Wig
- Wrap your wig with a silk or satin scarf at night
- Avoid excessive heat on synthetic wigs
- Store on a wig stand when not in use
- Clean gently using wig-safe products
For more care tips, visit our Braided Wig Care Blog.
Frequently Asked Questions
How long does a braided wig last?
With proper care, braided wigs can last several weeks while maintaining their style and structure.
Can beginners install braided wigs?
Yes! Glueless braided wigs are beginner-friendly and easy to install without professional help.
Are braided wigs suitable for daily wear?
Absolutely. When installed correctly, braided wigs are comfortable and ideal for everyday use.
Conclusion
Learning how to install braided wigs properly gives you flexibility, style, and confidence without spending hours in a salon.
Follow this guide to achieve a flawless look every time.
Ready to upgrade your style? Shop premium braided wigs today at Braids Wig Queen.